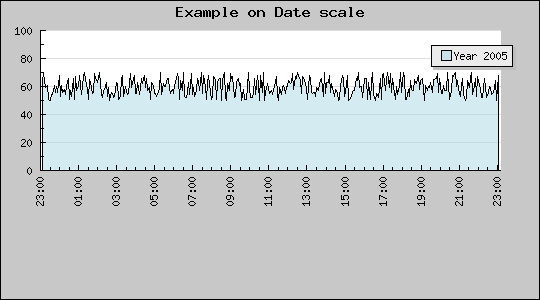
Figure 76: Using the special date X-axis with all default values [src]
The easiest way to get a date time scale for the X-axis is to use the pre-defined "dat" scale. To be able to use that it is first necessary to include the module "jpgraph_date.php" and the specify the scale, for example as "datlin" in the call to SetScale() as the following code snippet shows.
  require_once("../jpgraph.php");

require_once("../jpgraph_line.php");

require_once("../jpgraph_date.php");

...

$graph
= new Graph(540,
300);

$graph->SetScale(
'datlin');

...
The above code snippet would create a date/linear scale for the graph. We will first show a basic use of the date scale and then go on to illustrate how it is possible to tailor the exact formatting of the date axis.
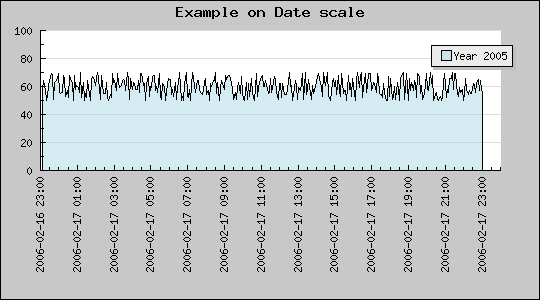
When using the fully automatic formatting the library will use the shortest possible string that uniquely identifieas a date/time. For example if the entire intervall falls within the same day only the time values will be displayed, if the intervall falls over several days then also the date will be added to the label.
As usual it is also possible to manually force a certain label formatting to be used this is illustrated below.
The first basic example below creates a data set that emulates a sample rate every S second and falls over a total period of two days. It is important to note that the input data on the X-axis must be a in the form of timestamp data, i.e. the number of seconds from the system epoch. In PHP the current timestamp value is returned by the function time().
This means that it is always mandatory to specify two input vectors for a plot. For example to specify a line plot
  $line
= new LinePlot
($data,$xdata);
The example below show this in practice
Please review the script (by following the [src] link) that creates this graph before continuing since we will base all further examples on the above example.
As can be seen from the above example the scale starts slightly before the first data point. Why? This is of course by purpose in order to make the first time label to start on an "even" value, in this case on an hour. Depending on the entire interval of the graph the start value will always be chosen to be the largest "even" time value, this could for example be on an even minute, even 30min, even hour, even day, even week and so on.
The alignment of the start (and end) vdate alignment can also be adjusted manually by using the two methods
These method allow the alignment to be made by specifying one of the following constants.
For the SetTimeAlign() the following symbolic constants can be used
For the SetDateAlign() the following symbolic constants can be used
Some examples will calrify the use of these methods.
Example 1. We want the time adjustment to start on an even quarter of an hour, i.e. an even 15 minute period.
  $graph
->xaxis->scale->
SetTimeAlign(
MINADJ_15);
Example 2. We want the time to start on an even 2 hour
  $graph
->xaxis->scale->
SetTimeAlign(
HOURADJ_2);
Example 3. We want the start to be on an even day
  $graph
->xaxis->scale->
SetDateAlign(
DAYADJ_1);
The default label format always tries to use the shortest possible unique string. To manually set a manual scale the method SetDateFormat() is used for example as in
  $graph
->xaxis->scale->
SetDateFormat(
'H:i');
The above example will force the labels to be displayed as hour (24h) and minutes.
As with the linear scale it is possible to indicate what density of scale ticks is needed. This is specified as usual with a call to Graph::SetTickDensity()
  $graph->SetTickDensity(
TICKD_DENSE);